Exercise Figure Lab
Iterating on the three-layer exercise illustration system. Each exercise gets a photorealistic two-shot + vector two-panel diagram.
NEW — Combined (Coaching + Biomechanics)
Generated using both the exercise-coaching-instruction skill (setup cues, feel descriptions, mental models) AND resistance-training-biomechanics skill (joint angles, EMG data, bar paths). Smooth teal mannequin figure style.
Deadlift — Combined V1
Left: 3-figure motion (setup→mid-pull→lockout) with bar-over-midfoot plumb line, Phase 1/2 labels, bar path arrow. Right: coaching setup detail with all angles (55-70° hip, 65-80° knee), "Push the floor away", "Pull slack out", "Protect armpits", red X on rounding. Generated with BOTH coaching + biomechanics skills.
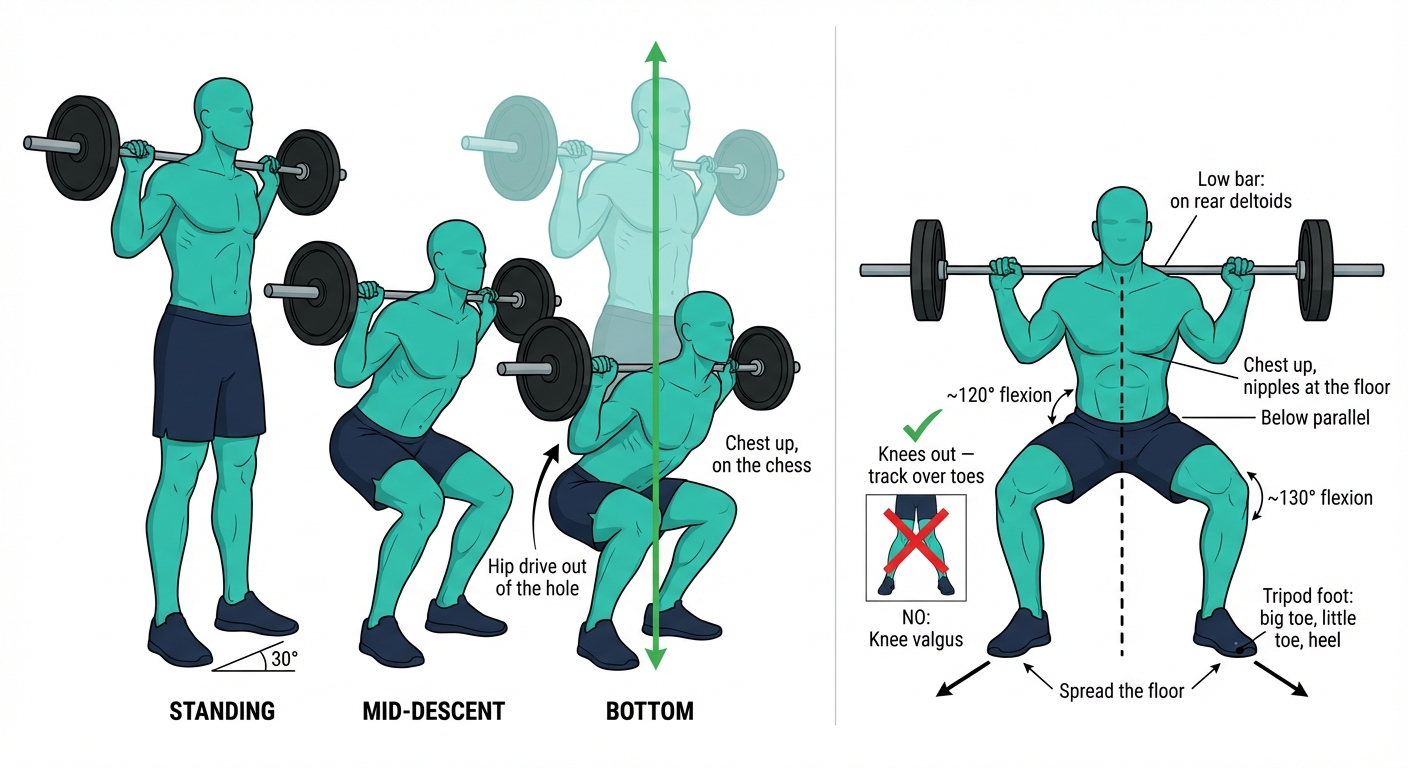
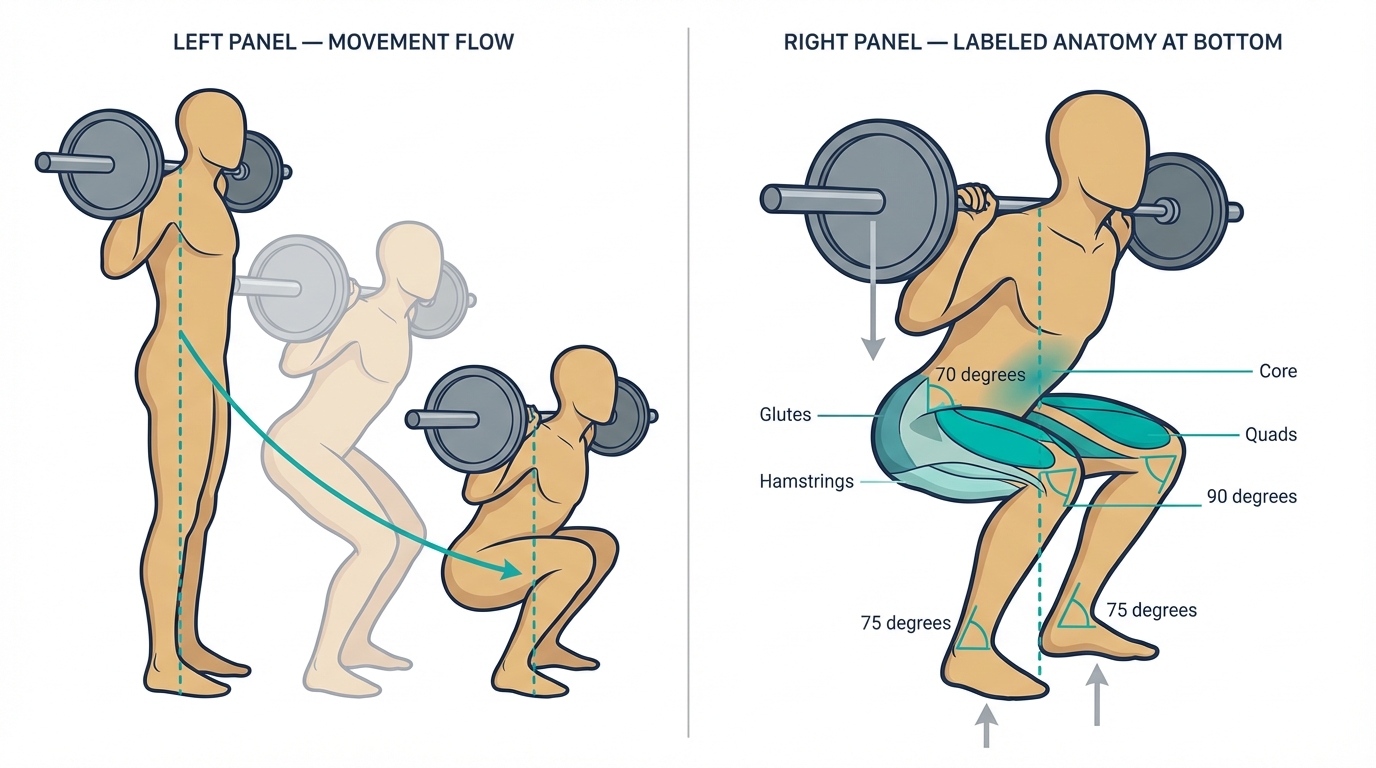
Squat — Combined V1
Left: 3-figure motion (standing→mid→bottom) with ghost overlay, hip drive arrow. Right: front view bottom position with knees out, tripod foot, spread the floor, knee valgus red X, ~120°/130° flexion, low bar on rear deltoids, nipples at floor. Generated with BOTH skills.
Bench Press — Combined V1
Left: side view with J-curve bar path, 3 positions on bench, leg drive arrow. Right: birds-eye with 45-75° elbow tuck (green), 90° flare red X, scapulae retracted, 5-point contact, grip width, "Push yourself AWAY". Generated with BOTH skills.
OHP — Combined V1
Left: 3-figure motion with "Head BACK"/"Head THROUGH" arrows, "Throw it!" cue, straight bar path. Right: front rack position with grip, forearms vertical, elbows scaption, bulldog grip, knees locked, squeeze glutes, hip lean vs lumbar arch. Generated with BOTH skills.
Locked — Barbell Bench Press
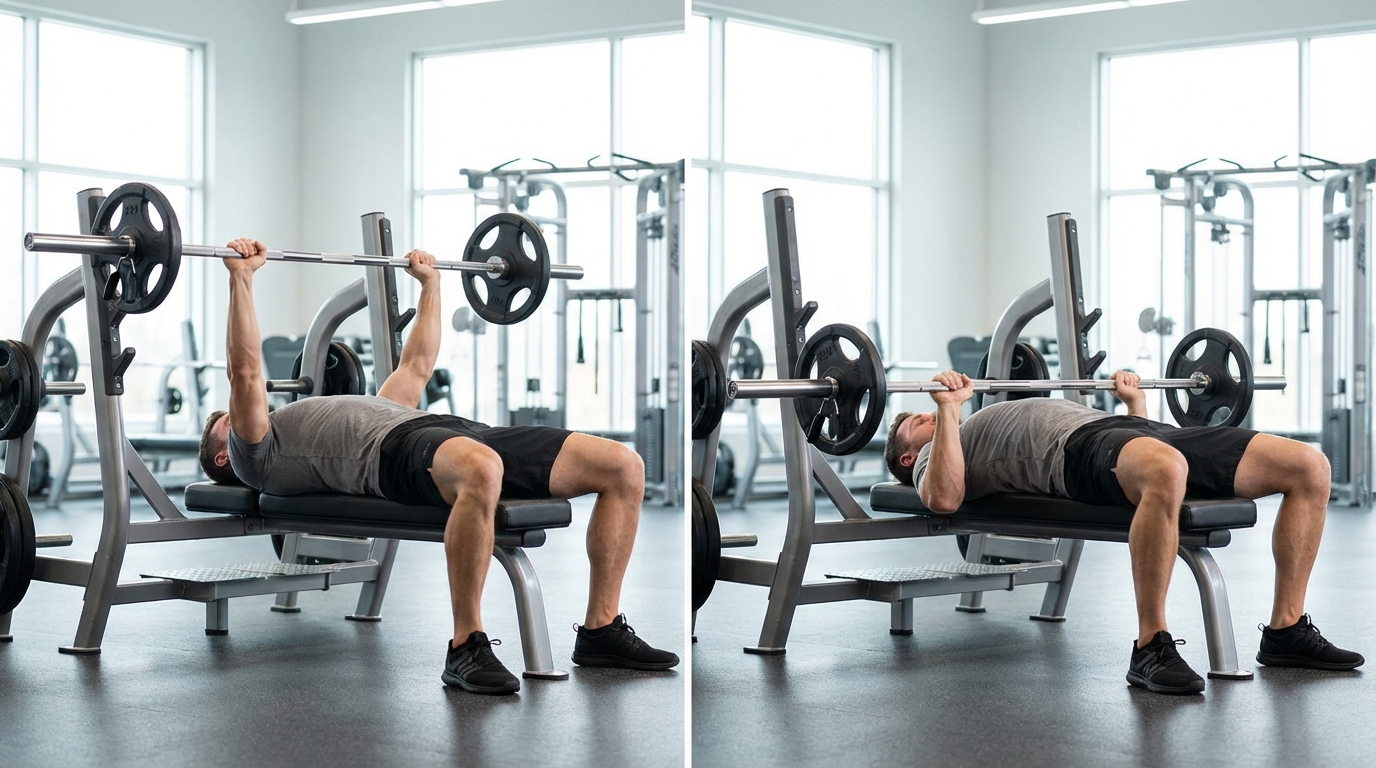
Bench Press — Photo Two-Shot
Lockout + bar at chest. 3/4 angle from foot-end showing elbow tuck and grip width.
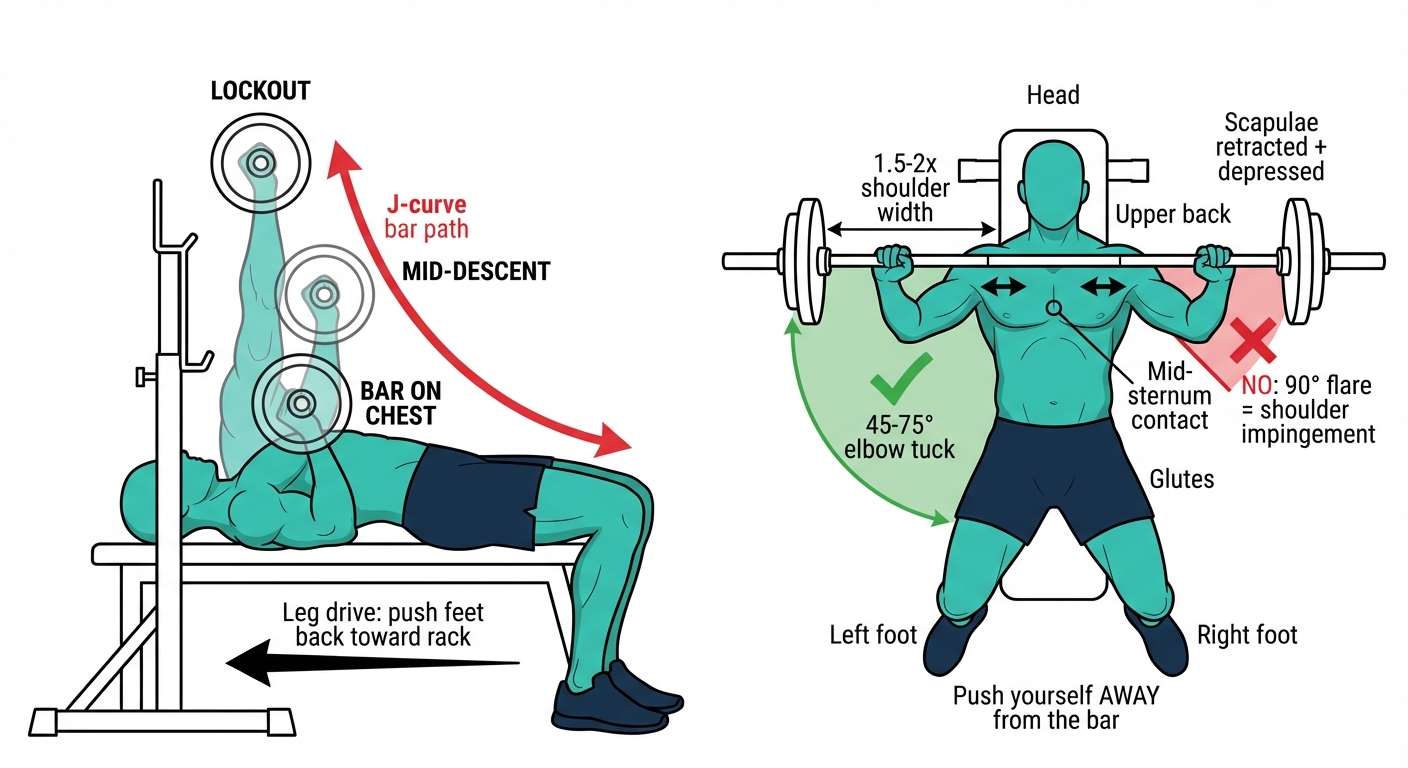
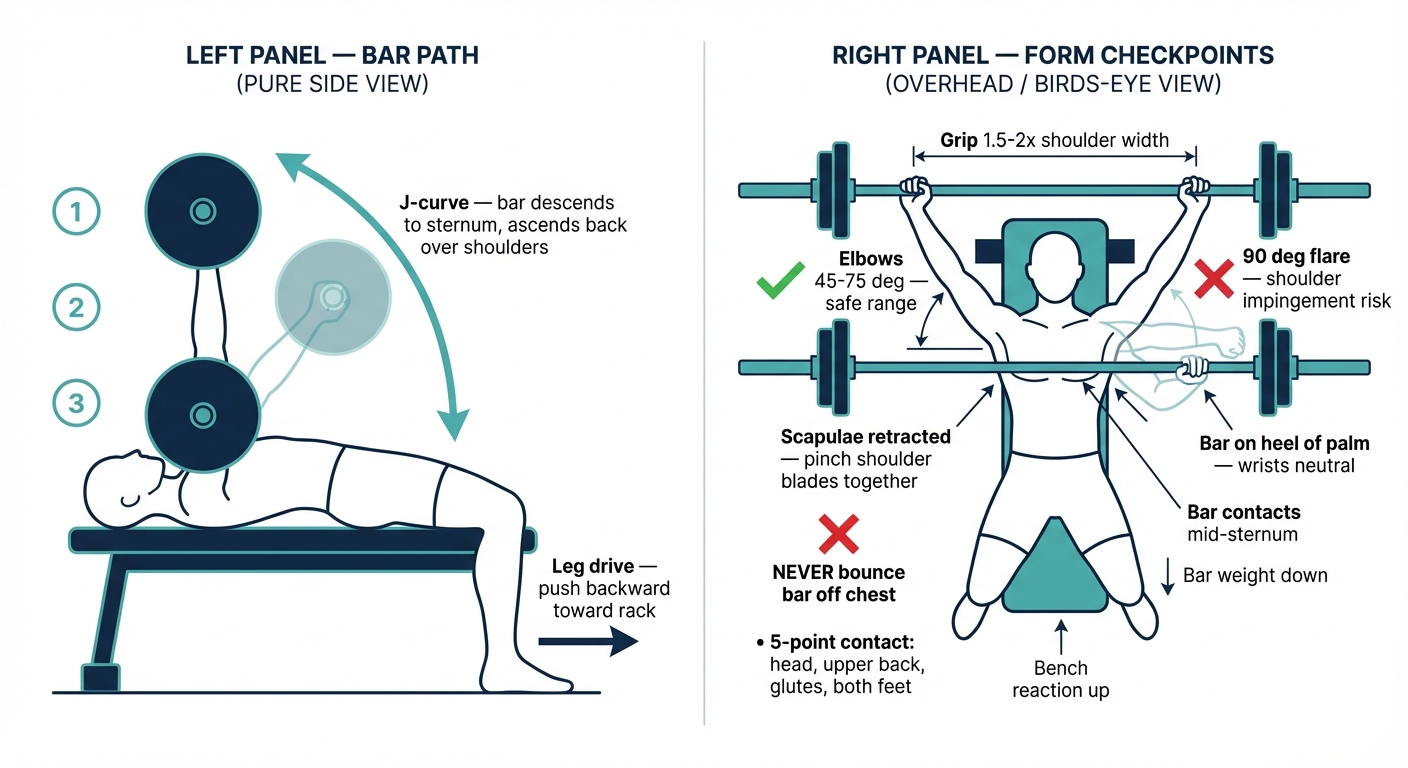
Bench Press — Vector V6 (FINAL)
Left: side view J-curve bar path (3 positions on bench — lockout, mid-descent, bar on chest), leg drive arrow. Right: birds-eye with clean outline figure, 45-75° elbow tuck (green check), 90° flare (red X), grip width, scapular retraction, mid-sternum contact, 5-point contact, force arrows. Generated WITH biomechanics skill.
Locked — Barbell Deadlift
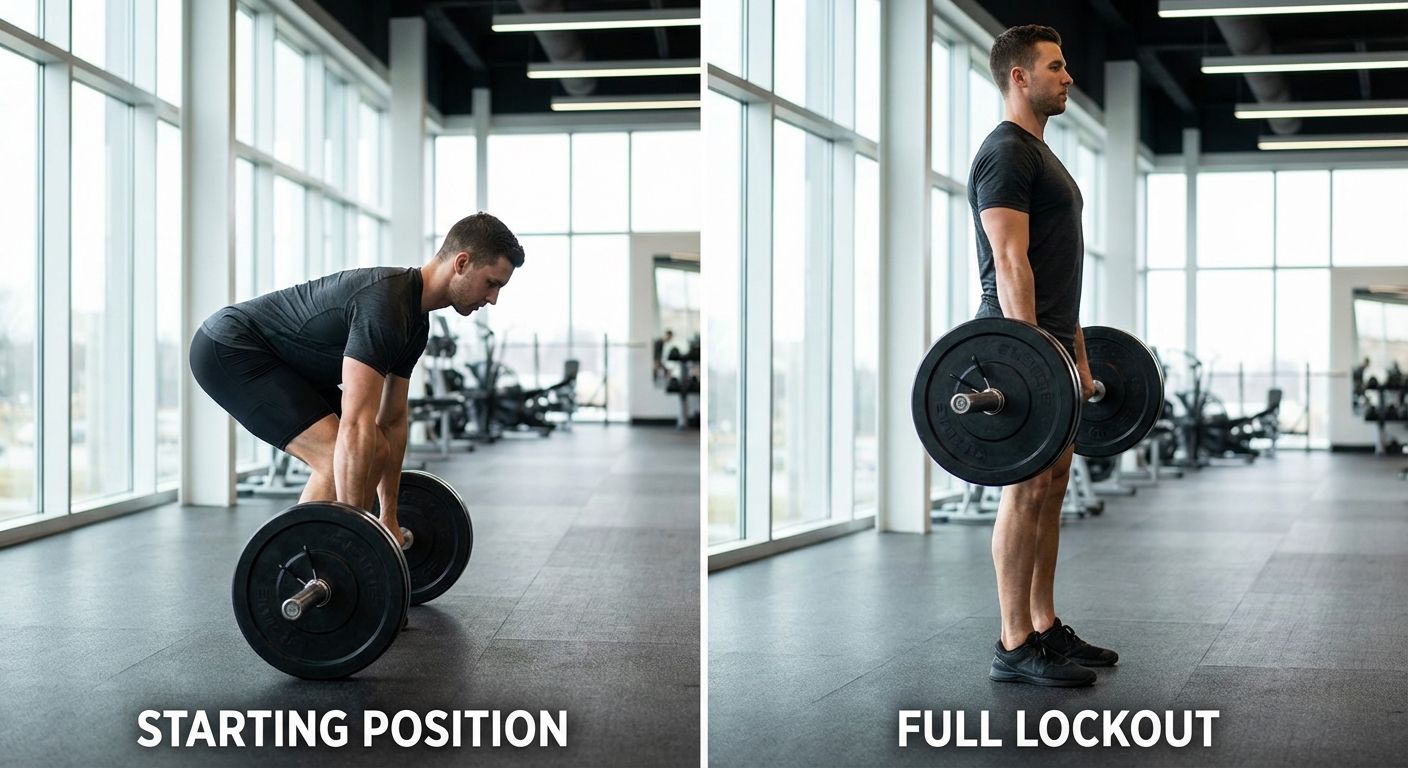
Deadlift — Photo Two-Shot
Setup position + lockout. Side angle showing spine position and bar proximity to shins.
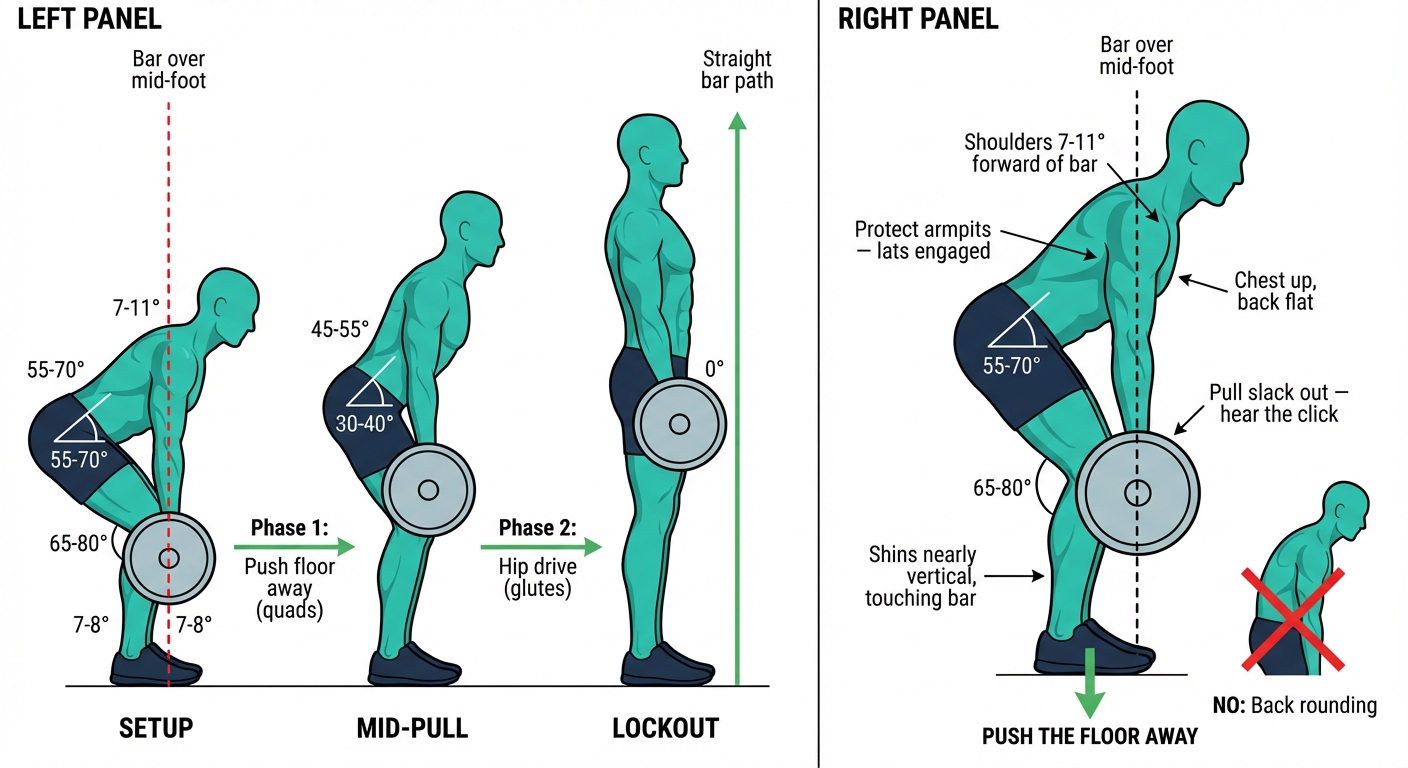
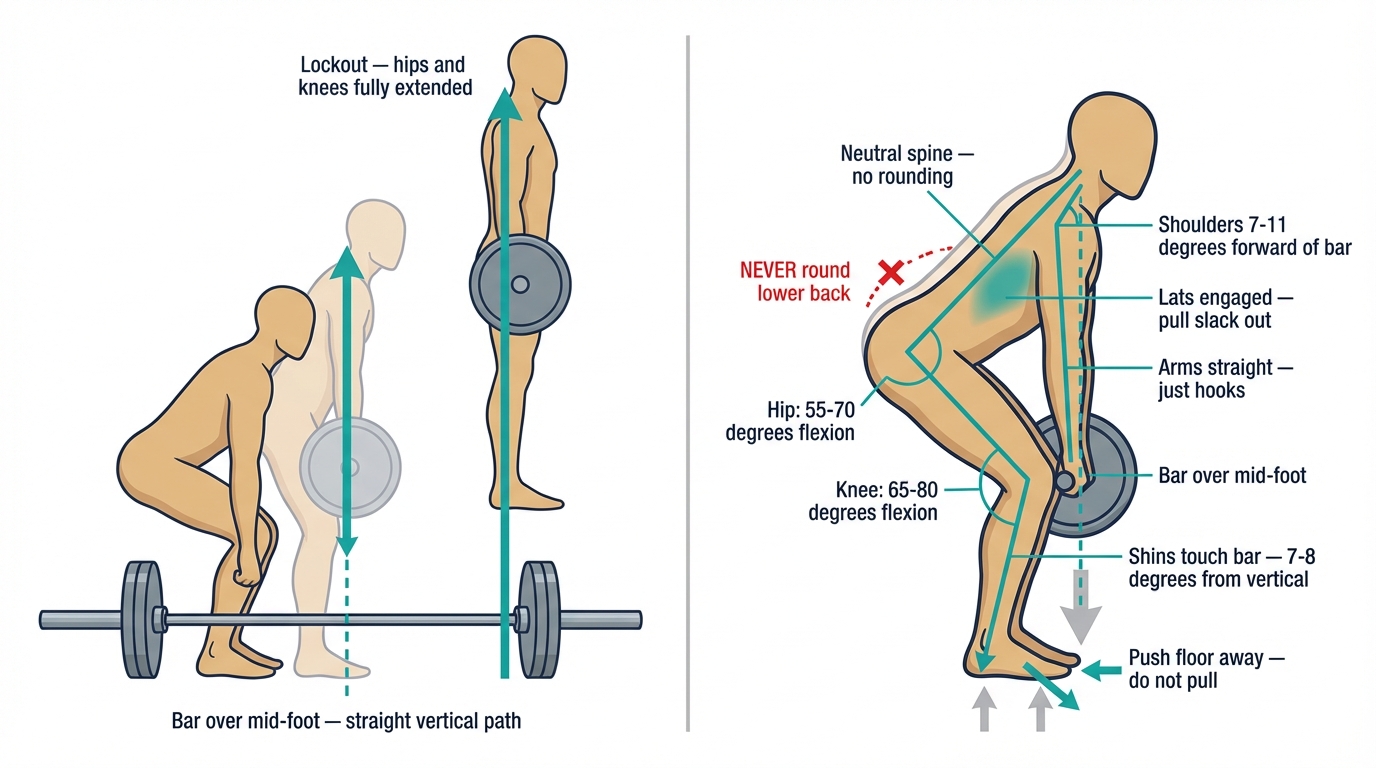
Deadlift — Vector V2 (FINAL)
Left: 3-figure motion sequence (setup → mid-pull → lockout) with vertical bar path arrow. Right: setup with hip 55-70°, knee 65-80°, shoulders 7-11° forward, shins 7-8° from vertical, force arrows, red X on rounding. Generated WITH biomechanics skill.
Locked — Barbell Overhead Press
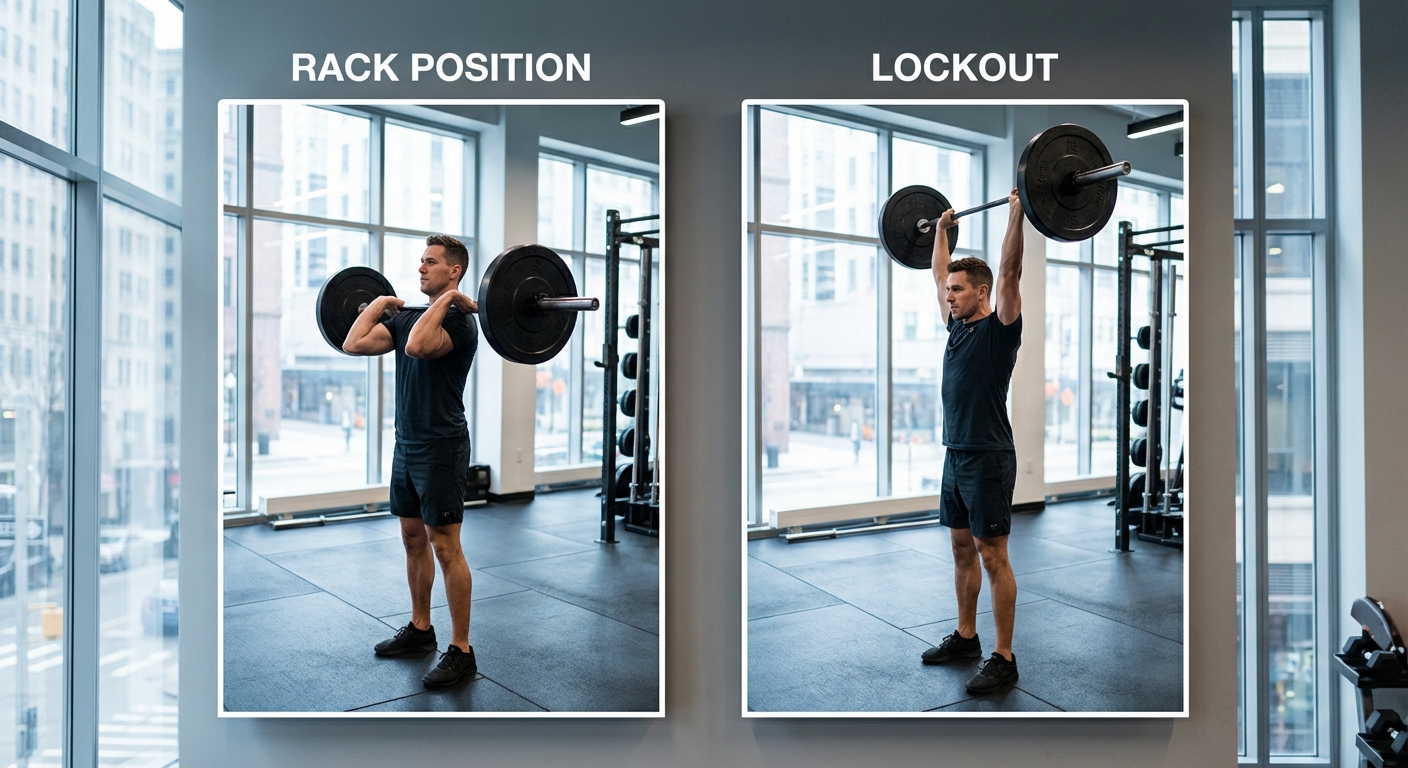
Overhead Press — Photo Two-Shot
Rack position (bar on anterior deltoids, elbows forward) + lockout (bar overhead, arms locked, head through). Side view, bright gym.
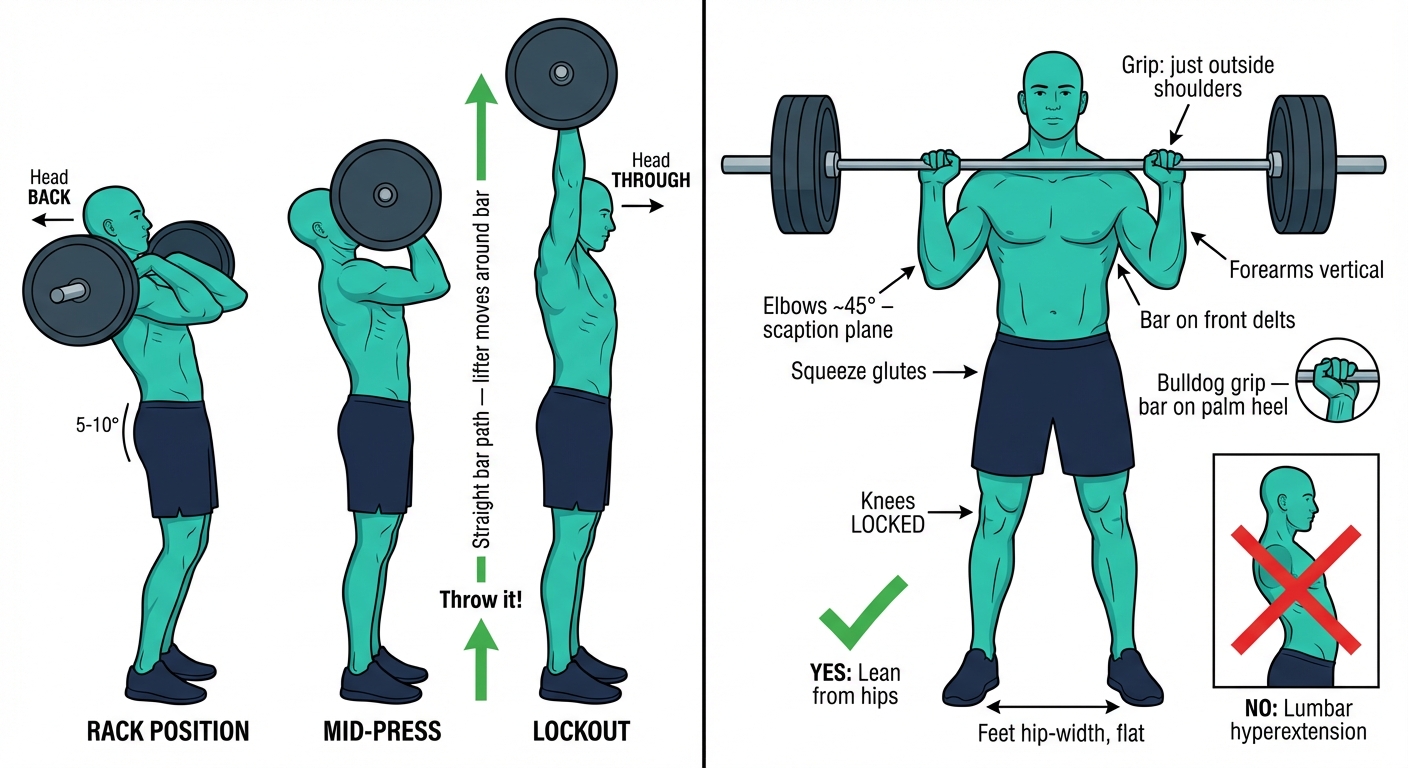
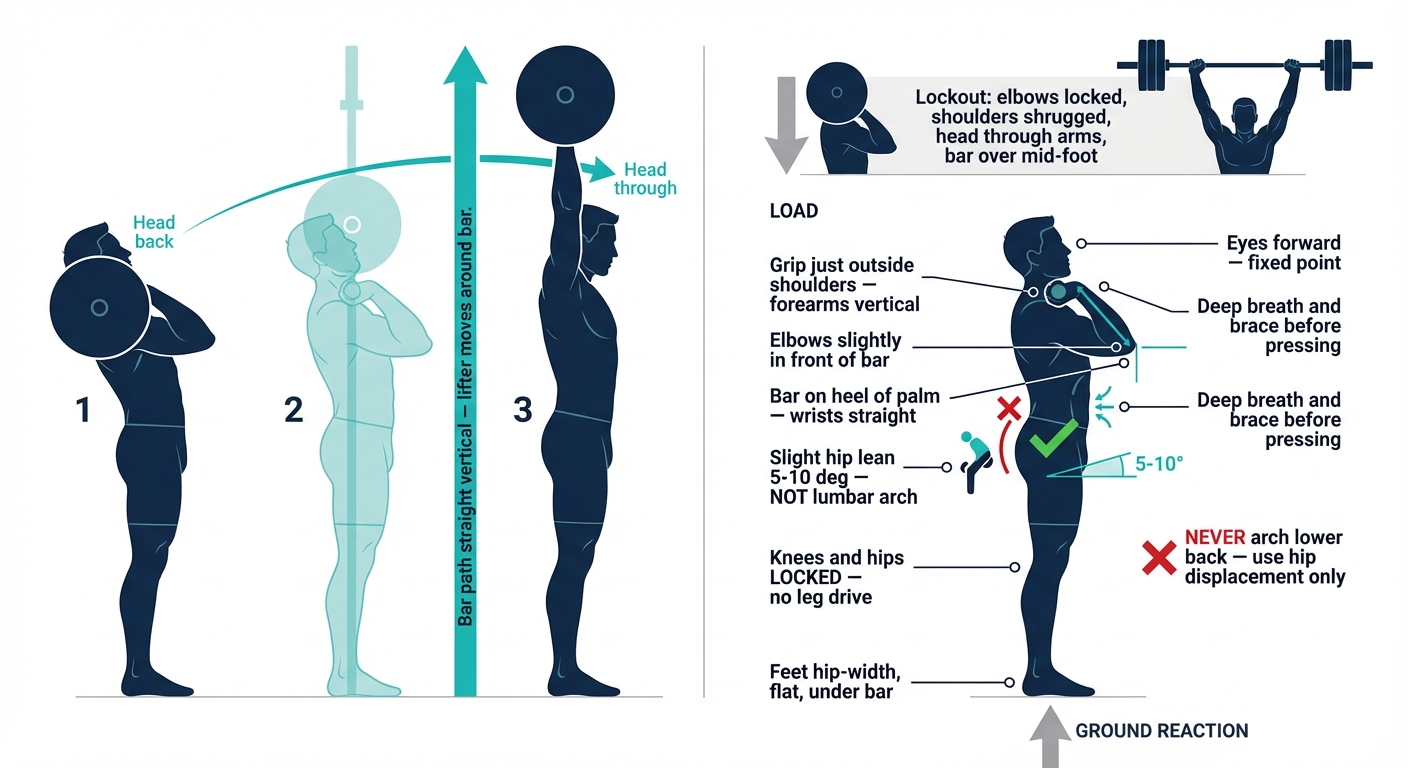
Overhead Press — Vector V1 (FINAL)
Left: 3-figure motion sequence with vertical bar path, head-back/head-through arrows. Right: rack position with grip width, elbows in front, wrist position, 5-10° hip lean (red X on lumbar arch), knees locked, lockout detail at top, force arrows.
Locked — Barbell Back Squat
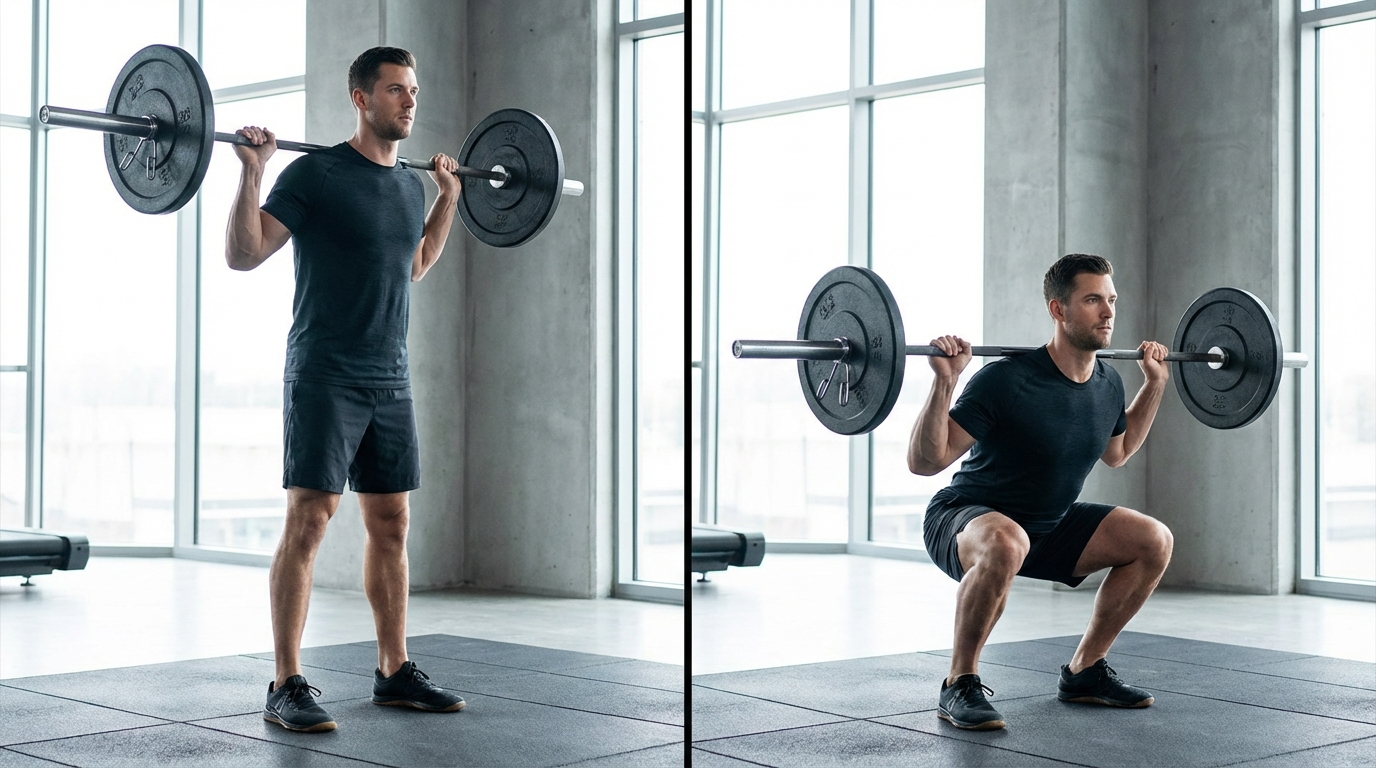
APPROVED — Photo Two-Shot
The photo standard. Standing setup next to full-depth squat. Same person, 3/4 angle, bright gym.
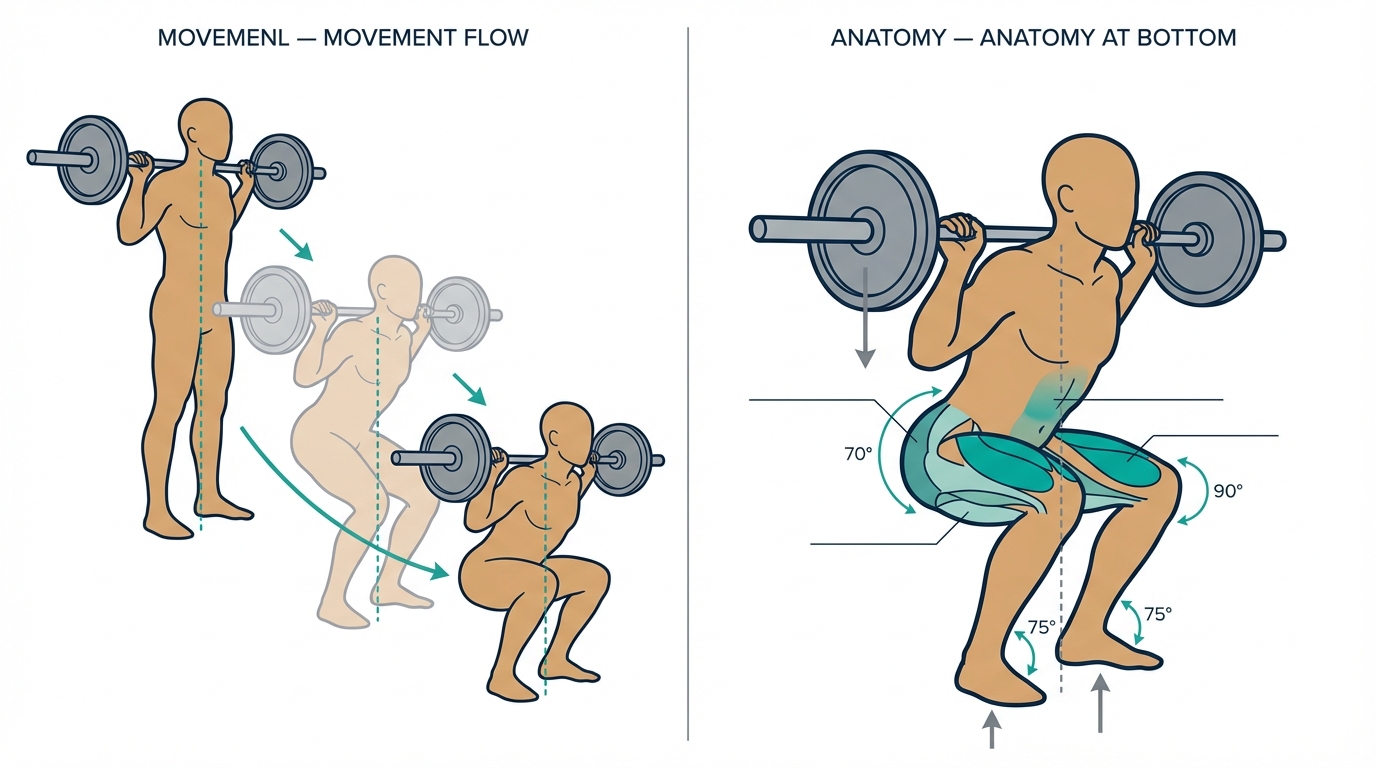
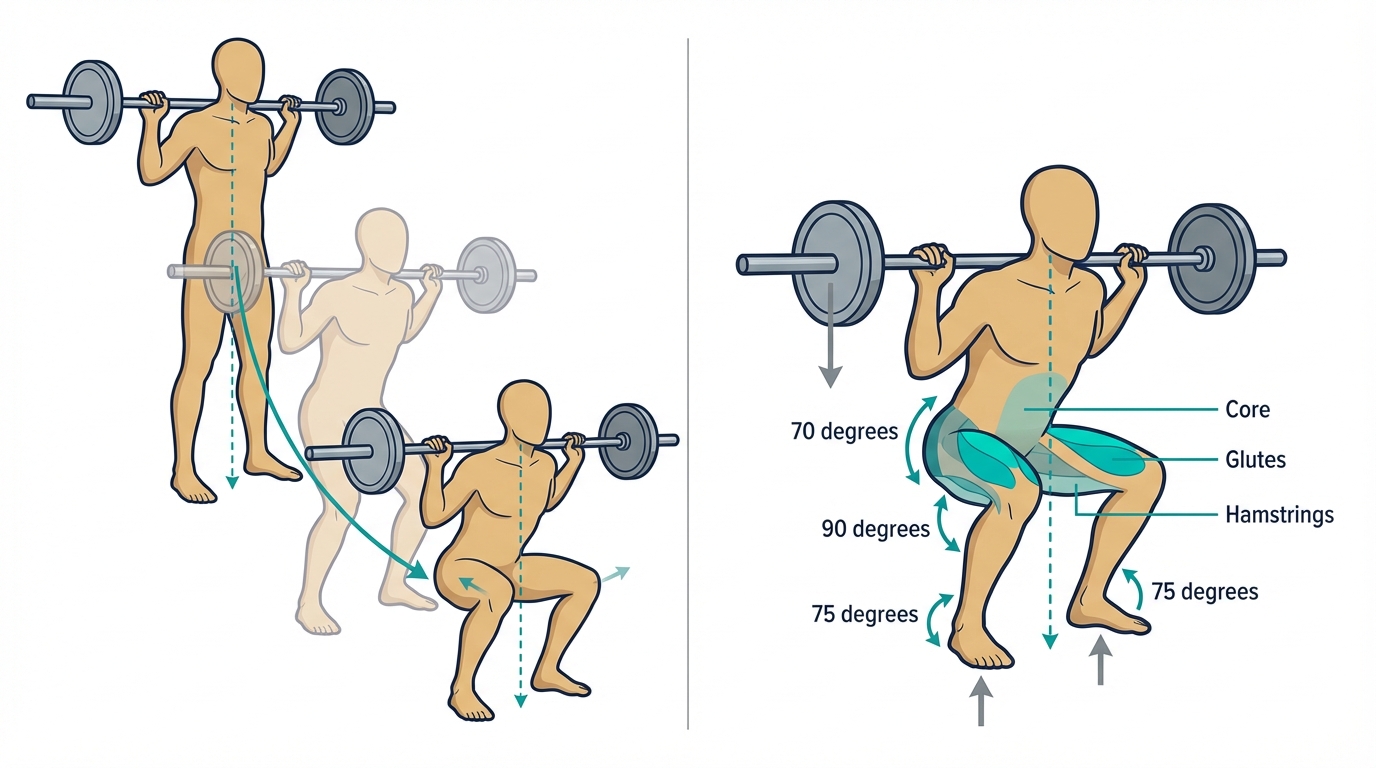
APPROVED — Vector Two-Panel (V14)
The vector standard. Motion flow (3 figures with ghost) + labeled anatomy (muscles, joint angles, force arrows). Fixes V13 missing Quads label and duplicate 75°.

Earlier Iterations
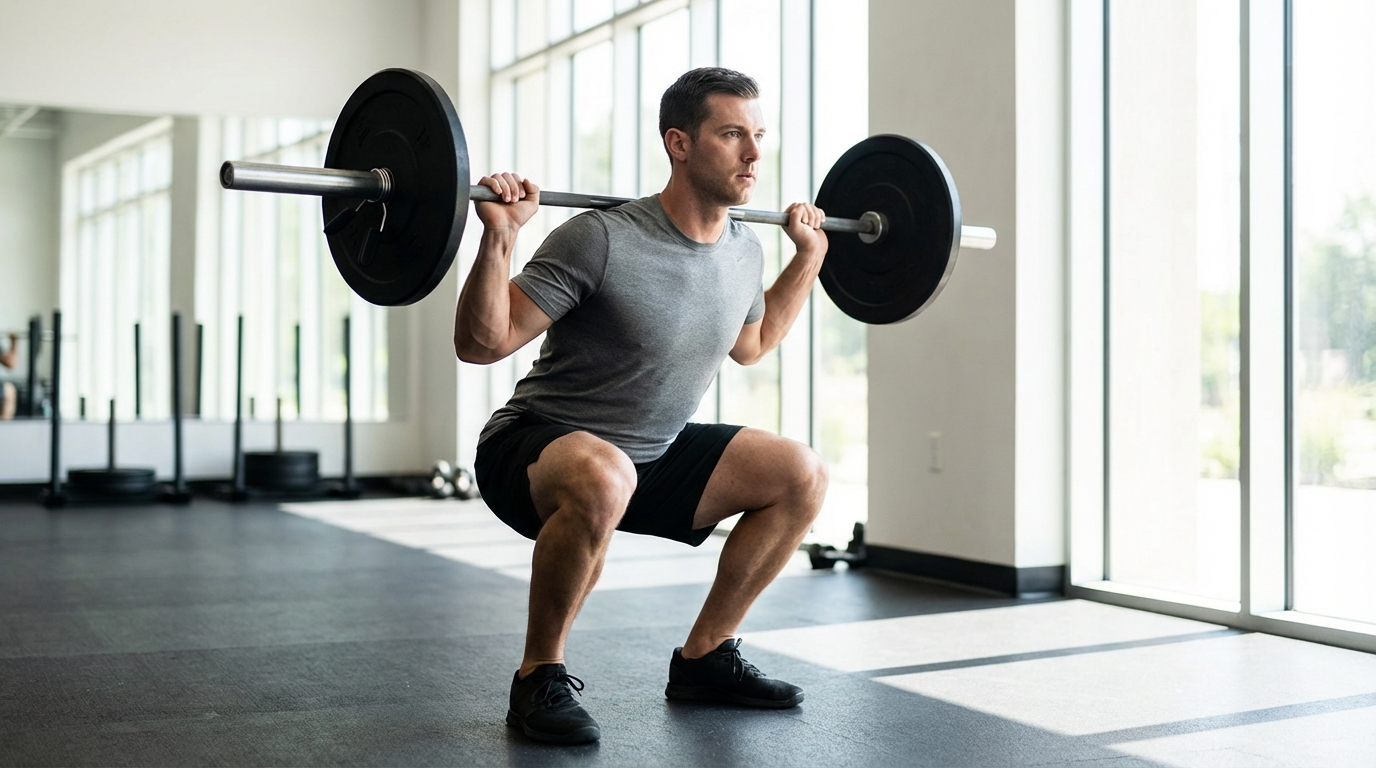
Photo C — 3-Frame Sequence
Standing → mid-descent → bottom. Photorealistic motion sequence.
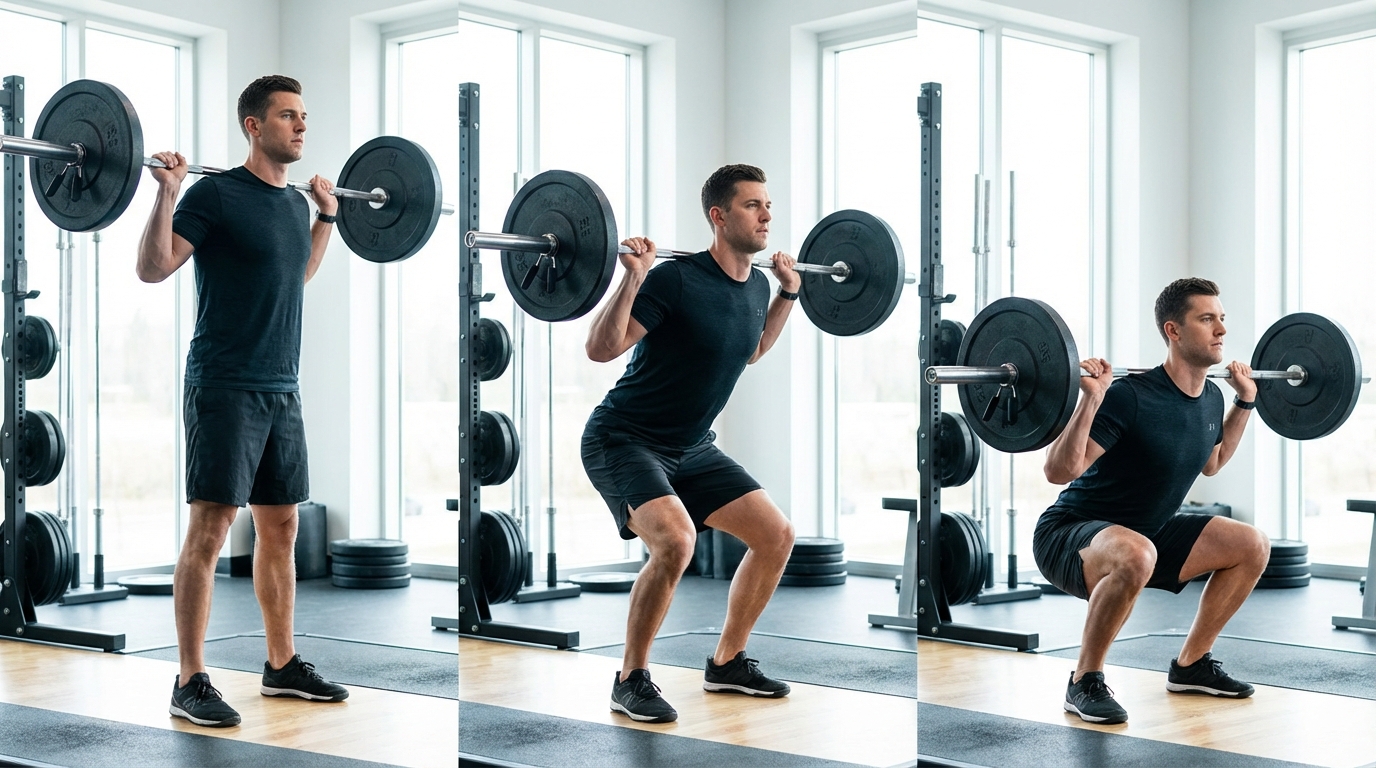
Photo A — Bottom Position Reference
Single shot at full depth. Knee spread, chest up, flat back.
V13 — Vector Two-Panel (3/4 angle)
Previous vector standard — missing Quads label, duplicate 75° angle.
V12 — Vector Two-Panel (side view)
Pure side view with full labels. Good labels but no knee spread visibility.
V9 — Refined Two-Panel A
Earlier two-panel refinement.